
By Kim Patrick
Welcome to our step-by-step guide on creating your very own homemade compost system! Composting is a fantastic way to turn your kitchen scraps and yard waste into nutrient-rich soil for your garden. By building your compost system, you reduce waste and promote sustainable gardening practices. Let’s get our hands dirty and embark on this rewarding journey of composting!

Section 1: Materials Needed
To begin, gather the following materials
- Compost bin or container: Choose a size that suits your available space and composting needs. It can be a purchased bin or repurposed container like a wooden crate or large plastic tub.
- Carbon-rich materials (brown materials): Collect dry leaves, straw, shredded paper, cardboard, wood chips, or sawdust. These provide the carbon element in the compost.
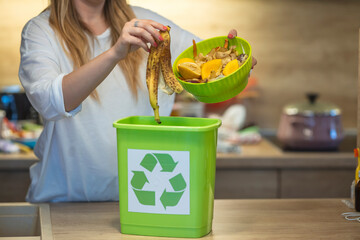
- Nitrogen-rich materials (green materials): Save vegetable scraps, fruit peels, coffee grounds, tea leaves, grass clippings, or plant trimmings. These contribute nitrogen to the compost.
- Water: Ensure access to a water source for maintaining proper moisture levels.
- Aeration tool: Use a pitchfork, garden fork, or compost-turning tool to aerate the compost pile.
- Compost thermometer (optional): A thermometer helps monitor the internal temperature of the compost.
Section 2: Setting Up Your Compost Bin
- Choose a suitable location: Find a spot in your yard with partial sunlight and proper drainage.
- Prepare the base: Lay a layer of twigs or small branches at the bottom of your compost bin. This base creates airflow and helps prevent the pile from becoming waterlogged.
- Layering the materials: Alternate between carbon-rich and nitrogen-rich materials, creating a balanced ratio of roughly three parts carbon to 1 part nitrogen. Aim for layers that are around 6-8 inches thick.
- Maintaining moisture: Keep the compost moist but not soaked. Sprinkle water as needed to achieve a watery sponge-like consistency.
- Aeration: Turn the compost regularly to introduce oxygen and facilitate decomposition. Aim to turn the pile every 1-2 weeks, mixing the outer materials into the center.
Section 3: What to Compost
Include the following in your compost pile
- Carbon-rich materials: Dry leaves, straw, shredded paper, cardboard, wood chips, sawdust, or dried garden waste.
- Nitrogen-rich materials: Vegetable scraps, fruit peels, coffee grounds, tea leaves, grass clippings, or plant trimmings.
Avoid composting meat, dairy products, oily or greasy items, diseased plants, weeds with mature seeds, and pet waste.
Section 4: Troubleshooting and Maintenance
- Monitoring: Regularly check the temperature and moisture level of your compost. Aim for a temperature range of 120-160°F (49-71°C). Adjust moisture and aeration as necessary.
- Troubleshooting: Address any issues such as foul odors or slow decomposition. Ensure the carbon-to-nitrogen ratio is balanced and the pile is adequately aerated and moistened.
- Harvesting the compost: After several months, your compost will transform into dark, crumbly humus. Harvest it by sifting out any remaining materials. Use the finished compost to enrich your garden soil.
My Final Thoughts
Congratulations on building your own homemade compost system! By composting at home, you reduce waste, promote sustainable gardening practices, and nourish your plants with nutrient-rich soil. Enjoy the rewards of this eco-friendly endeavor and watch your garden flourish. Remember, sustainable living starts with small actions like composting. Together, we can make a positive impact on our environment and promote change!
